

October in ComfyUI brought a collection of new model families and Partner Nodes, but those weren’t the only things new to ComfyUI. Alongside these model drops, we shipped a long list of smaller quality-of-life changes to the graph, the canvas and the tools around them. Each of these changes help by removing a click, a stall or a surprise that people kept running into. Here’s a tour of what changed this last month.
[Image: A Branch Node choosing between three named paths. Only the selected path executes. The Nodes feeding the other two never run. Alt text: A Branch Node with three named inputs, with only the selected path highlighted as running.]
Everything in this post is available in ComfyUI v0.45. A few items are currently just in Comfy Cloud but will soon be coming to local ComfyUI.
Choose a path with the Branch Node
Trying a few variations in one Workflow used to mean duplicating entire workflows, or bypassing Nodes by hand before every run. TheBranchNode, released in v0.43, lets you wire several paths into a single Node and pick the one you want by name. Only that path runs, so you don’t spend GPU time on the others.
Connect up to 32 inputs, and the Node adds a new slot each time you connect one. Double-click an input to rename it to a custom name. Then pick one in the selector widget. One thing to keep in mind with the BranchNode is if a Node on a path you didn’t pick also feeds another output, it will still run since that output needs it.
[Image: Renaming Branch inputs, then switching the selector between them.]
The first type you connect sets the type of every other input and of the output, so Branch works with images, latents, models, conditioning and strings. For a true or false choice, If/Else Switch does the same lazy selection with a boolean. Both Nodes are in the utilities/logic category and are marked experimental while we collect feedback.
Stack LoRAs in one Node
Stacking LoRAs used to mean chaining one loader per LoRA and keeping the model and CLIP connections in order between them. ComfyUI v0.42.3 enables two native stack Nodes, Load LoRA (Model) and Load LoRA (Text Encoder).
[Image: Load LoRA (Model) with three rows, the second one switched off.]
Each row has three fields: lora_name, strength and enabled. As you add a row, the Node grows to accommodate up to 20 LoRAs. Toggling a row off skips that specific LoRA but keeps its file and strength, so switching it back on preserves your settings. Rows that are off, or set to a strength of 0, are skipped before their file loads, so a disabled LoRA adds no load time.
The saved Workflow records how many rows each Node has, so rows and their values come back when you reopen it. Each row has the same model picker as the single LoRA loader, and dragging a LoRA from the Model library onto the Node fills the first matching row. The stack Nodes first appeared in v0.40 and are enabled from v0.42.3, the first release that includes the frontend support they need.
If you’ve used the Power Lora Loader from the rgthree Custom Node pack, this will look a bit familiar but with a some changes. Since they’re built directly into ComfyUI, they’re designed for Nodes 2.0 from the start.
Download models and inputs for templates
Opening a template used to leave you with empty Load Image Nodes and a hunt for sample files before the workflow would run. In Comfy Desktop, official templates now download the example inputs they use, such as a sample image or audio clip. Open the template, press Run, and the example Workflow works as shown.
This update to templates extends to models too. When a template needs a model you don’t have, Comfy Desktop lists them before the Workflow opens, with their sizes and two choices: Download models & open or Open now. Models you download through Comfy Desktop land in the correct model folder automatically, so the template finds them on the first run. In portable and git installs, models download through your browser, so you still need to move each file into its model folder by hand.
[Image: A template opening in Comfy Desktop with its sample image already loaded in Load Image, ready to run.]
Only official templates download inputs automatically. Custom templates and templates added by Custom Nodes can’t, so a template from an unknown source can’t pull files onto your machine.
Download results as one zip
Nodes that produce several outputs now have an Export images action in their image preview and in the output Node’s right-click menu. It opens a dialog that lists every output with a thumbnail and a checkbox, all selected by default. One selected output downloads directly in it’s format while two or more outputs will download as a single zip.
The Assets panel works the same way. Select several assets, or a job that produced several outputs, and they download as one zip. This used to work only on Comfy Cloud. From v0.40 it works anywhere the assets system is on. The assets system is enabled by default in Comfy Desktop and the Windows portable build. In a manual install, start ComfyUI with --enable-assets. Without the assets system, both actions download each file separately.
Work with EXR, HDR and ProRes
Several parts of the EXR and HDR pipeline came together this month:
EXR previews in Assets:
Save Image (Advanced)writes a browser-friendly preview next to each EXR it saves, so EXR outputs show thumbnails in the Assets panel and the queue instead of a broken image (v0.40).The HDR viewer opens from the queue and Assets: Clicking an EXR or HDR output opens it in the HDR viewer. ComfyUI recognizes
.exrand.hdrfiles dropped on the canvas by their extension.Convert SDR to HDR: A Node that expands sRGB images into Rec.2020 HLG, with a target peak luminance setting (650nits by default) (v0.41).ACEScg: A color space option in
Convert Image Color Spaceand an EXR option inSave Image (Advanced)(v0.43).Smaller EXR files: The EXR option in
Save Image (Advanced)defaults to 16-bit float, and saved EXR files are compressed (v0.39 and v0.40).ProRes in
Save Video:Save Videocan write ProRes in a.movfile, ready for editing and finishing tools. Setformattomov, or set the codec toproresand leaveformatonauto, which picks MOV for you (v0.44).
Tidy up your links
Big Workflows can turn into a tangle of links fast. October brought a set of tools for hiding, selecting and removing them to keep your workflows clean
Hide links and rename their labels
Right-click the dot in the middle of a link to open its contextual menu, then select Hide. The long curve disappears and a small label appears at each end, showing what the link carries. Hover a label to see the full link again, or right-click it to Show the link or Rename the label. Hidden links and their labels are saved with the Workflow.
[Gif to showcase the hiding of the link]
You can also hide links straight from a socket in Comfy Cloud now with support coming to local ComfyUI very soon. Click a linked socket, instead of dragging from it, and a small menu appears above it with Hide and Delete. It acts on all of that socket’s links at once, and if they’re already hidden, the menu shows Show instead. Dragging from a socket still starts a new link.
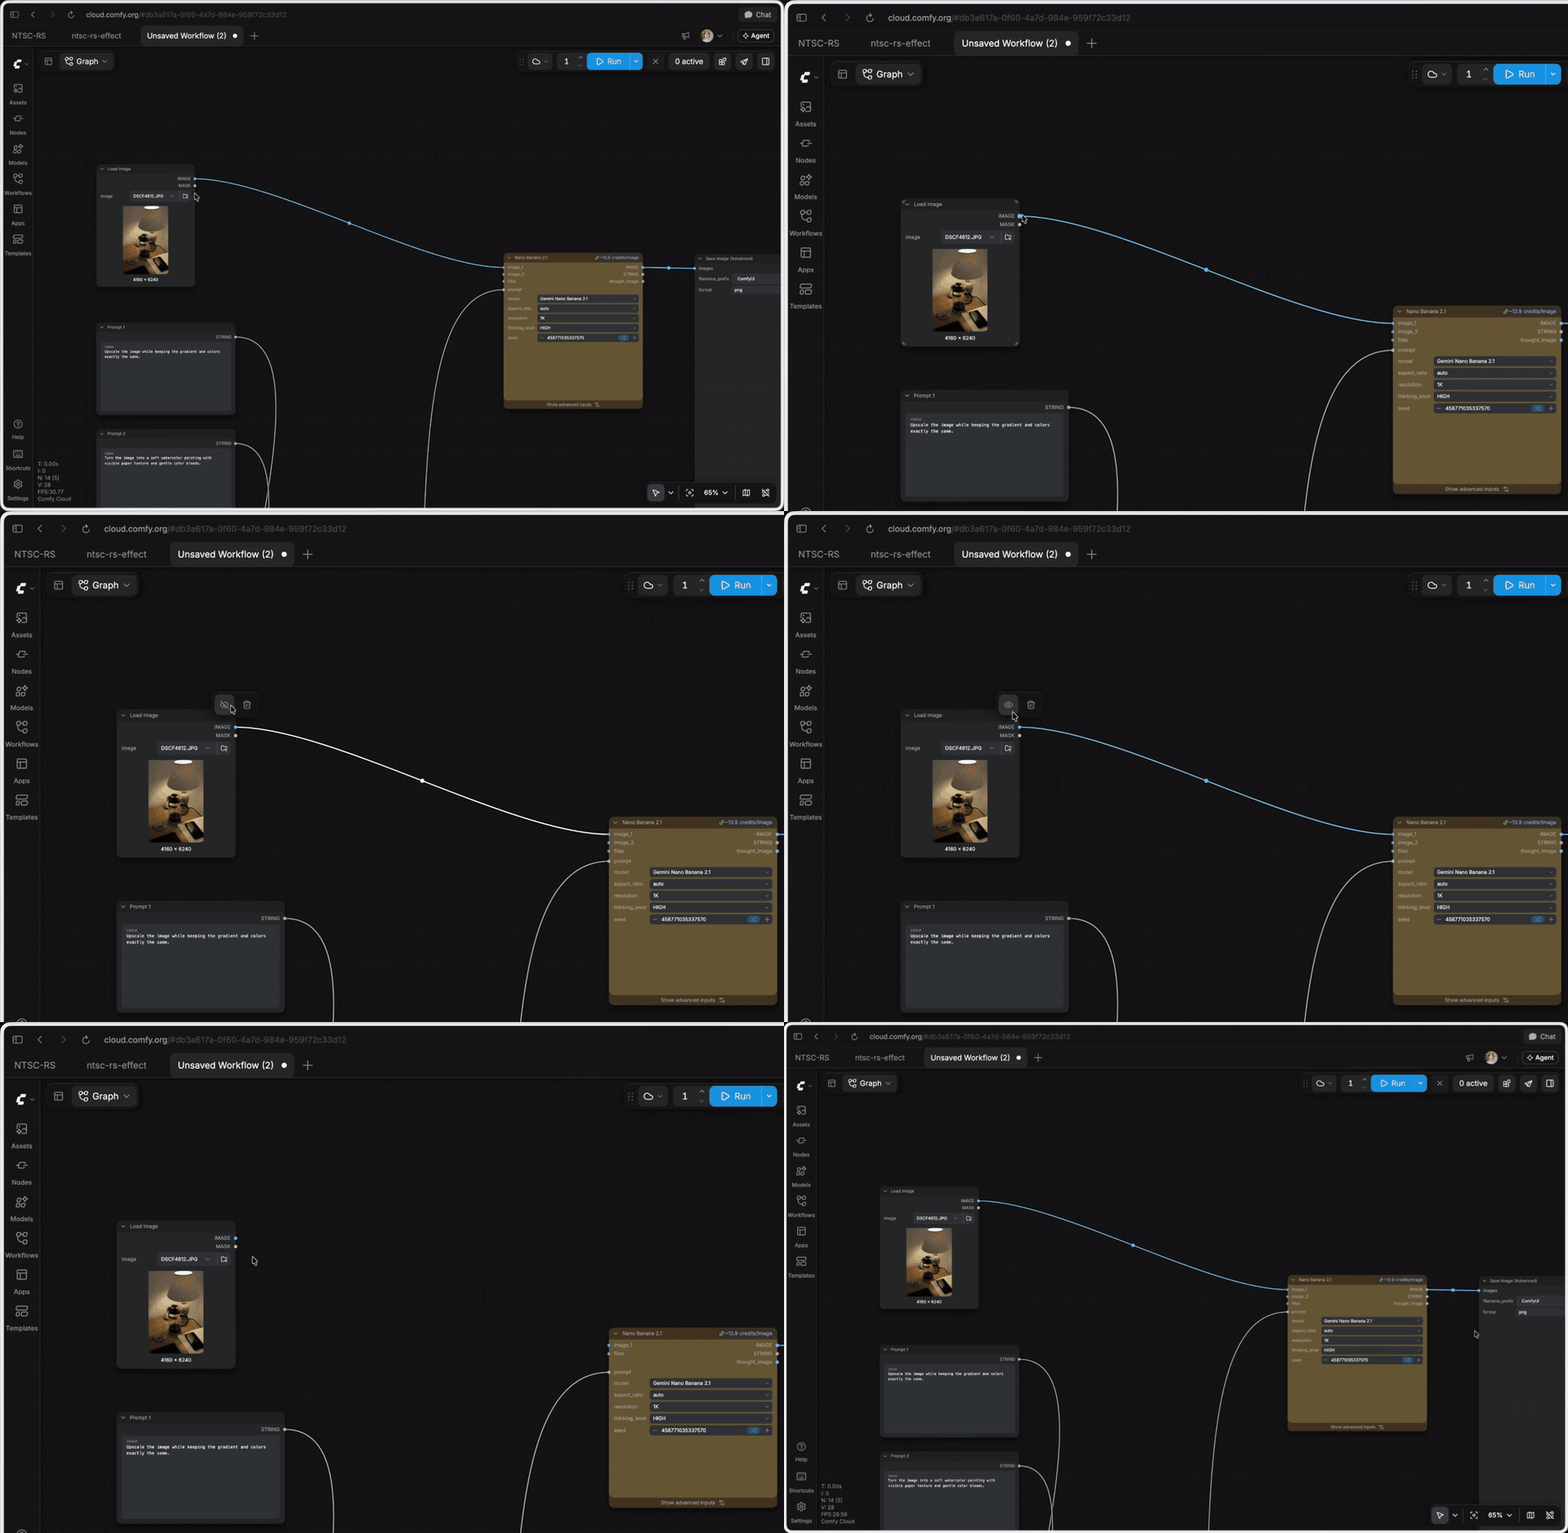
Hold Shift, Ctrl, Cmd or Alt while you click to keep your current selection instead.
Want to skip the menu? Press Ctrl+Alt (Cmd+Option on macOS) and click a socket to delete its links in one go.
Select several links with a box
Drag a selection box across empty canvas. If the box doesn’t catch any Nodes, groups or reroutes, it selects the links it crosses, and the same Hide and Delete menu appears. A link only counts if the visible line passes through the box, so a long curve that only passes near the box isn’t selected. Press Delete to delete the selected links.
When several unlabeled hidden links leave the same socket, they display as a single label with the type and a count instead of a column of separate labels in Comfy Cloud now. Hover the label to reveal the links, or click it to expand one label per link. When you hide a link, it splits at the middle and each half snaps back into its socket, so you can see which sockets it connected.
Undo and redo inside a widget
Some widgets contain small editors within a single Node, allowing you to drag points on a curve, draw bounding boxes, or move crop handles. These editor widgets now have their own Undo and Redo buttons in their toolbar, so you can step back through edits to that one widget. Each finished edit, such as a handle drag or an added point, is one step.
In v0.45: the curve, range, light info and bounding box widgets.
In addition, Comfy Cloud supports the image crop, video trim and crop, and color widgets.
This also keeps your two different types of undo apart. Before, widget edits and graph edits shared one history, so pressing Ctrl+Z to undo a Node move could undo a curve tweak instead. Now Ctrl+Z on the canvas covers the graph, and each widget keeps its own history until you close the Workflow.
[Image: Adjusting a curve, then stepping back through the edits with the widget’s Undo button. The canvas history stays unchanged.]
To summarize
In October, ComfyUI added native branching, a single Node for stacking LoRAs, Comfy Desktop templates that download their own inputs and models, zip downloads for multiple outputs, a more complete EXR, HDR and ProRes pipeline, new ways to hide, select and delete links, and Undo and Redo buttons inside widgets. Everything here is something already in ComfyUI v0.45, either in Comfy Cloud now or coming to local ComfyUI with the next frontend update. Almost all of these started as either a comment in Discord or a GitHub issue. If there is a small change that would make your day better, open an issue on ComfyUI_frontend or tell us in Discord.
Full changelogs: ComfyUI releases and ComfyUI_frontend releases.